GROWING CILANTRO SEED

Growing cilantro from seed


 Native to the subtropical climates of southern Europe and North Africa onwards to southwestern Asia, it is surprisingly cold tolerant and will grow quite happily as a garden herb in northern European gardens.

You can sow cilantro seed from April onwards, but before sowing you will need to prepare a seedbed, preferably in full sun. If you are growing cilantro for its edible seeds then full sun is required. If you are looking to harvest its aromatic leaves then you can get away with partial-shade if necessary.

Cilantro seedlings
Cilantro will require a light, free-draining soil that has been raked over to produce a fine tilth. Sow the seed thinly at a depth of ½ inch in rows 12 inches apart. If the soil is dry then water first before sowing. You can expect the seedlings to emerge between 1 and 3 weeks depending on how warm the weather is. Thin out to every 3 inches if you want a supply of fresh leaves, and every 9 inches if you want to harvest seeds  Sow every few weeks to provide a succession of fresh leaves through out the year.

Harvest leaves once the plants reach between 4-6 inches tall.

For related articles click onto the following links:
BBC Coriander
Buy Giant Leek Seeds
HOW TO GROW CHAMOMILE
How to Grow Chives
HOW TO GROW CORIANDER FROM SEED
TOP TEN HERBS FOR A HERB GARDEN

GROW SWEET PEA SEEDS

Growing sweet pea seeds


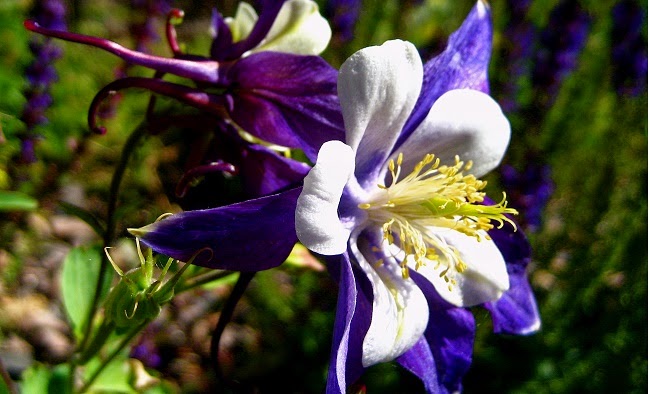
If you are looking to grow sweet peas the choice available can be mind boggling. To make it easier, check out a selection of my favourite varieties.

Sweet Pea Blue Ripple

Sweet Pea 'Blue Ripple' is a beautiful, strong growing variety with rippling ice white petals which are marbled in a most unusual shade of blue.

The deeply scented flowers of Sweet Pea 'Blue Ripple' are carried on top of long, straight stems making them ideal for cut flowers. Sweet pea 'Blue Ripple will reach a height of approximately 6 ft with a width of 1 ft.

Sweet Pea 'Fragrantissima'

Sweet Pea 'Fragrantissima' embraces the full colour spectrum from white, through all the pink shades, reds, blues, purples, bicolours, and stripes. This large flowered mix has been carefully blended to ensure an even balance of colour and fragrance.

Enjoy them in the garden, grown against walls and fences, or cut some of the sturdy, straight stems for a vase indoors. Sweet Pea 'Fragrantissima' will grow to a height of approximately 6 ft 6 inches with a spread of 12 inches.

Sweet Pea 'Juliet'

Sweet pea 'Juliet' has a wonderful cream colouring and unusual fragrance, and considered my many to be in a class of its own. As each creamy bloom opens, it reveals a hint of apricot and a citrus overtone to its heady sweet-pea scent.

Sweet pea 'Juliet' produces exhibition quality blooms and will reach a height of approximately 6 ft tall.

Sweet Pea King Size Navy Blue

Sweet Pea 'King Size Navy Blue' is one of the darkest blue sweet peas in existence. It can produce up to five large, wavy blooms are borne on long, slender stems, making this an excellent cut flower, where its fragrance will pervade the air.

It is  a superb performing garden variety. Let it intertwine with paler varieties for an unforgettable display in the garden. It will reach a height of around 6 ft and a spread of 12 inches.

Sweet Pea 'Night and Day'

Sweet Pea 'Night and Day' is a striking mix of cultivars which will provide a plentiful supply of long stemmed blooms in richly contrasting shades of burgundy and white.

These vigorous climbers are beautifully scented and make a superb summer display. The flowers of Sweet Pea 'Night and Day' are ideal for adding to cut flower arrangements.  It will reach a height of around 6 ft and a spread of 12 inches.

Sweet Pea 'Wiltshire Ripple'

Sweet Pea Wiltshire Ripple is an old heirloom variety is worth discovering for its abundance of distinctive, bi-colour, striped blooms of rich claret on a snow-white background.

Each straight stem of Sweet Pea 'Wiltshire Ripple' carries 3-4 richly scented blooms that make superb cut flowers and a fine display in the garden. It will reach a height of around 6 ft and a spread of 12 inches.

For related articles click onto the following links:
HOW TO GROW AUTUMN SHOWINGS OF SWEET PEAS
HOW TO GROW MINA LOBATA - The Spanish Flag
HOW TO GROW SWEET PEAS FROM SEED

GROW BAT FLOWER SEED

Grow bat plant seed


Germinating Bat plant seeds can be a little hit and miss, so to help it is best to soak them in warm water for 24 hours. The trouble is that warm water has a nasty habit of cooling down but I have a tip for you. Take a thermos flask and fill with water.

Tacca seeds
Throw away 2/3 rds of the water and boil the remainder. As soon as the remainder has boiled put it back into the flask, then fill to within a couple of inches of the top with cold tap water and add the seed. Put the lid on, shake and wait. Twenty four hours later drain the water out through a fine sieve to catch the seeds.

While you are waiting, fill a modular seed tray with a good quality compost such as John Innes 'Seed and Cutting' but add a few handfuls of horticultural grade grit-sand to improve the drainage.

When ready, press the seed into the surface of the compost and cover with a light sprinkling of vermiculite. Next, place inside a heated propagator at a temperature of between 27-30. Place in a bright position but one that does not receive direct sunlight.

Image credit - glenn 130356@googlemail.com
Germination can be erratic taking between 1-9 months so be patient and avoid the temptation of throwing out the seed tray in frustration. Keep the compost moist through the germination period.

Once the Bat plant seedlings have established their root system within the module they can be popped out and potted on into 3 inch pots containing a good quality free draining compost. Try and disturb the root system as little as possible when potting on.

Water regularly over the growing season,  allow the compost to be drier, but not to dry out during the winter.

For related articles click onto the following links:
KEW Bat Flower
THE BAT PLANT
THE WHITE BAT PLANT - Tacca integrifolia

HOW TO GROW THE VIRGINIA CREEPER FROM CUTTINGS

How to grow the virginia creeper from cuttings


The Virginia creeper - Parthenocissus quinquefolia is one of the very best climbing plants for autumn colour and, like its closely related cousin the grape vine, it is very easy to propagate. You get two opportunities to take cuttings from the Virginia creeper, the first is as semi-ripe cuttings in August to September and then as hardwood cuttings from November onwards. Hardwood cutting are taken in the dormant season after leaf drop, and avoiding periods of severe frost. The ideal time is just after leaf fall in late autumn or just before bud-burst in spring.

Semi-ripe cuttings

Taking Virginia creeper for cutting material
Using a sharp, sterilized blade, take 4-5 inch nodal cuttings from half-ripened stems and insert them singularly into pots containing a good quality compost such as John Innes 'Seed and Cutting'. You may wish to mix in extra horticultural grade grit-sand to improve the drainage further. Do not allow the cutting to dry out between taking it from the vine and planting it in the pot. If there will be a delay or the weather is hot, wrap the cuttings inside a moist paper towel and keep it out of the sun if you can't plant it immediately.

Note: A nodal cutting is a stem cutting that has been cut above and below a leaf joint.

Water in and then once the excess has drained away place the pots into a propagating frame or large heated propagator at a temperature of between 13-16 degrees Celsius. Keep out of direct sunlight. Once the cuttings have rooted they can be removed from the propagator and grown on under protecting in cool conditions avoiding freezing conditions. Once rooted the cuttings can be potted on into 1 litre pots. They can be planted out into their final positions once the threat of late frosts have passed in the spring.

Hardwood cuttings

Preparing stem cuttings
This is a far simpler technique. Again using a sharp, sterilized blade, time take longer nodal cuttings between 10 and 12 inches. Insert them 6 inches apart into a weed-free, well-drained bed outside making sure that half their length in in the soil. They should root over the winter period and produce new growth in the spring.

Leave the cuttings in place until the following autumn making sure that they do not dry out over the in summer. Once the cuttings have dropped their leaves, carefully lift them making sure that as much of the root systems is kept intact and pot them on in to a good quality compost such as John Innes 'No 3'.

For related article click onto the following links:
CLIMBING PLANTS FOR AUTUMN COLOUR
CLIMBING PLANTS FOR FOLIAGE COLOUR EFFECT
HOW TO PROPAGATE ABUTILON FROM CUTTINGS
HOW TO GROW IVY FROM CUTTINGS
HOW TO GROW LAPAGERIA ROSEA FROM SEED
HOW TO PROPAGATE BOX HEDGING PLANTS
HOW TO TAKE CUTTINGS FROM CAMELLIA
HOW TO TAKE CUTTINGS FROM CLEMATIS
HOW TAKE CUTTINGS FROM BOUGAINVILLEA
HOW TO TAKE CUTTINGS FROM FUCHSIA
HOW TO TAKE HONEYSUCKLE CUTTINGS
HOW TO TAKE CUTTINGS FROM TRACHELOSPERMUM JASMINOIDES
HOW TO TAKE CUTTINGS OF WISTERIA
How to Take Hardwood Cuttings

GROW BLUE POPPY SEEDS

Grow blue poppy seeds


Formerly known as Meconopsis betonicifolia and perhaps more commonly as the Himalayan blue poppy, this darling of a hardy perennial is must for those gardeners looking for something a little more unusual.

Blue poppy flower
Although the flowers are similar in design to true poppies, and the genus closely related as it from Papaveraceae family, they require significantly different conditions if they are to thrive. True poppies are from the genus papaver, the majority of which have evolved to survive long, dry summers. However Meconopsis require cooler and far wetter conditions.

The Himalayan blue poppy has been dogged by reports of poor performance for many years but this is only because the conditions of its native habitat are rarely taken into consideration.

When germinating blue poppy seeds it is advisable to pre-chill seed for 3-4 weeks in the salad drawer of a refrigerator. do not place in the freezer! The best times of year to sow are in winter and early spring, although you can have success sowing in March to April.

Using a modular seed tray, fill with a good quality compost such as John Innes 'Seed and Cutting', but consider mixing in a couple of handfuls of horticultural grit-sand before hand to improve the drainage further.

Blue poppy seeds
Sow one seed per module and gently press in to the surface of the compost. Meconopsis seeds require light to help initiate germination so cover the seed with a light sprinkling of compost or vermiculite. Gently water with a soft rose or partially submerge the tray into a large bowl of water to allow the water to naturally soak through to the top of the compost. Place the tray outside in a cold frame or cool, sheltered position. You will need to keep the compost moist, not waterlogged, and protect from heavy rain which can knock the seed out of the compost. It is fine for the seeds to be exposed to frosts as this will help to break dormancy.

Leave outside for 5-6 weeks then bring the modular tray back under protection at a temperature of between 13-18 degrees Celsius. You can use a heated propagator to achieve this or seal inside a clear polythene bag. Place in a warm, bright room, but one that is out of direct sunlight to avoid drying out the compost.

Buy blue poppy seedlings
Germination can be erratic but once the seedlings have established a decent root system their module can be popped out and potted on into 3 inch pots containing ericaceous compost.

After 6 weeks or so hardened them off of 10-14 days before either potting them on into 2-3 litre pots or planting them into their final position. Blue poppies prefer a deep, moist loam in a sheltered semi-shaded position.

For related articles click onto the following links:
Gardeners World Meconopsis
HOW TO GROW THE CALIFORNIAN POPPY
HOW TO GROW THE HIMALAYAN BLUE POPPY - Meconopsis betonicifolia - FROM SEED
THE ORIENTAL POPPY - Papaver orientale

HOW TO GROW GIANT TOMATOES

How to grow giant tomatoes


If you are only familiar with the tomatoes found of the shelves your local supermarket then competition or exhibition sized tomatoes can be a bit of a surprise. Growing giant tomatoes that are 2 lbs or more are not difficult so long as you start off with the right seed varieties, but experienced growers can produce fruit up to an enormous 12 lbs in weight!

Beefsteak tomatoes - https://australianseed.com/
Of course, you can't just use regular tomato seeds and hope that good cultivation will produce the results you're look for. Only beefsteak varieties are up to the challenge, even so you need to begin with specially developed cultivars that have been selected over time for their desired growth characteristics. If you are not sure what seed to purchase then choose varieties that have the words like big, giant or colossus in the name.

Proven seed varieties include 'Giant Belgium', 'Delicious', 'Big Beef'', 'Celebrity' and 'Brutus'.

Before you even think of sowing tomato seed you will need to prepare your soil first, and no you can't grow giant tomatoes in grow bags. In cooler European climates you will need to grow giant tomato plants under the protection of a greenhouse or polytunnel but even so they will still need to be grown in the soil.

You will need to provide a moist, fertile and well-drained soil so dig in plenty of well-rotted garden manure, leaf-mold and mushroom compost into the bed. You can also add well-rotted farm manure but be aware that too much will provide an excess of nitrogen, which is fine if you want to produce a lot of foliage but not so good for producing flowers and their subsequent and fruits.

Image credit - http://www.landshare.net/
To make the most of your growing season you will need to start the seed off early, usually January. Fill 3 inch pots with a good quality compost such as John Innes 'Seed and Cutting'. Sow the tomato seeds on to the surface at a rate of one seed per pot and water in. To germinate you will need to provide a temperature of approximately 15-20 degrees Celsius so place the pots inside a heated propagator or keep them in a warm bright room in the house. Do not keep them in direct sun as this can dry out the soil. To keep the soil moist and to provide a good level of humidity cover the pots with a sheet of glass or clear plastic or seal the pots inside a large, clear, polythene bag.

The seedlings should emerge in 7-14 days, at which point their cover should be removed. Water as necessary and after 3-4 weeks the should be ready to be potted on into 4-5 inch pots. Once the young plants when they are about 6-8 inches tall and the flowers of the first truss are just beginning to open they can be planted into their prepared bed.

Water little but often and provide a humus rich, water-retentive mulching until the ground warms up and the plants begin to flower. Fertilize every two weeks with a dilute fish emulsion fertilizer or proprietary tomato fertilizer.

Tomato megabloom - http://veggies-only.blogspot.co.uk/
For really big fruit keep and eye out for extra-large tomato flowers known as mega-blooms. A mega bloom occurs when two or more flowers that have fused together to form one big flower. This in turn will produce tomato fruits that have joined together to create one enormous monster tomato. If you can't find a mega-bloom, then thin out the flowers so that there is only 2-3 per truss.

Help with the pollination of tomato plants grown under glass of polytunnels, using a thick, soft artist's paintbrush gently take the pollen from one tomato flower and brush it against another.

Allow only one stem to develop, and remove side-shoots as they appear. As the plants mature, prune off tomatoes that develop farthest from the stem and eventually leave just one fruit per cluster. Remove all but two or three of the biggest fruits from each plant. It's best to stop fruits from developing at the top of the vine as these will divert energy from the larger fruits at the base. Prevent the branches from breaking by supporting the tomatoes with ladies tights or some such material when your giant tomatoes start to get really big.

If you wish to grow giant tomatoes the following year in the same position then consider replacing the compost to avoid a buildup of pests and diseases.

For related articles click onto the following links:
BLIGHT RESISTANT TOMATO SEEDS - Tomato 'Ferline'
BLIGHT RESISTANT TOMATO VARIETIES
BUY GIANT TOMATO SEEDS
FLEA BEETLES ON TOMATO PLANTS
HOW TO COLLECT AND PREPARE TOMATO SEEDS FOR PROPAGATION
HOW TO GROW GREENHOUSE TOMATO PLANTS FROM SEED
HOW TO GROW OUTDOOR TOMATO PLANTS FROM SEED
HOW TO GROW TOMATOES
HOW TO GROW TOMATOES IN POTS
HOW TO MAKE A TRADITIONAL ITALIAN TOMATO SAUCE
RHS Tomatoes

HOW TO GROW GIANT POT LEEKS

Image credit - http://keithfoster.wordpress.com/

Click this link for the Amazing Range of Keith Foster Seeds


Growing giant competitive leeks is serious business and the secrets to attaining the very largest sizes are always kept very close to the chest. However Joe Jones, perhaps the greatest pot leek grower of all time, has allowed a glimpse into his world, and now anyone with a genuine passion can achieve impressive results.While many other growers would start far earlier, Joe Jones would religiously sow his pot leek seed under the protection of a greenhouse around Christmas time using propagation benches fitted with under-soil heating set at about 12 degrees Celsius - do not be tempted by using higher temperatures. Competitive growers will also use supplementary lighting up until the end of February for approximately 10 hours of light from 7 am to 5 pm.

Joe Jones - Image credit http://keithfoster.wordpress.com/
One seed was sown in a 3 inch plastic pots using John Innes 'No 1' compost. and buried in the heated bed to the same soil line. As each month passed each leek would be potted on into another pot but one which was only 1 inch or so larger and placed back into the propagation bed. On the third potting on, change compost to John Innes 'No 2'. On the fifth potting change the compost to John Innes 'No 3'. Once the threat of late frosts have passed the under-soil heating can be turned off. Come early June they would come out of the plastic pots and potted on into a 10 inch terracotta pots, the last pot size before planting outside into raised beds. Be aware that each year these beds will need to be emptied of old compost and then re-filled with a new mix.

Joe Jones would use old railway sleepers to make a raised bed approximately 3 ft high and about 4 ft wide. Sterilise the ground below the raised bed and the inside of the timbers before filling. Over the winter the raised bed will need to be filled in layers, the first being an inch of sterilized soil followed by an inch of 'as-old-as-you-can-get' well-rotted farmyard manure. Joe would use manure that was at least 5 years old, but this isn't really necessary. The layering of compost and manure is repeated to near the top of the bed. Sprinkle bone meal and old locomotive clinker between each layer. Consider using horticultural grit, hortag (expanded clay), perlite, or vermiculite if clinker isn't available. The final height of the compost will need to be 10 inches from the top of the bed so that fresh dry soil can be added to the top to bleach the bottoms of the leeks.

Once in the beds avoid the temptation to feed with a liquid fertilizer as this can cause unwanted height, however controlled release fertilizers such as osmocote have proven to give good results. The rest is up to you.

For related articles click onto the following links:

GROW GIANT LEEK SEEDS

Image credit - http://keithfoster.wordpress.com/


If you are looking to grow giant exhibition leek seeds then you usually have a choice of two different forms. Blanch leeks and pot leeks.

Growing giant leeks
Growing giant leeks is still a highly competitive game and as such the secrets to achieving these massive sizes is often a closely guarded secret. However, many growers will sow their seed in December in 3-4 inch pots using a good quality compost such as John Innes.

After a few weeks they can be potted on into 1 litre pots containing John Innes 'No 2' with perlite or vermiculite added for extra drainage.

This production is carried out  under the protection of a heated greenhouse or polytunnel and given approximately 10 hours a day of supplemental lighting until late February. Of course this can also be achieved in a cool bright room in the house or conservatory.

Maintain an average temperature of approximately 10-12 degrees Celsius but try to avoid going over 14 degrees Celsius with pot leeks as they will grow too long.

Pot on giant leeks every 3 weeks using fresh compost until they are in a 3 litre pot. Once the threat of late frosts have passed they can be hardened off and planted out in their final positions at the end of May.

For related articles click onto the following links:
How to Grow Giant Pot Leeks

HOW TO TAKE CUTTINGS FROM GARDENIAS

Image credit - http://www.aezarien.com/


Gardenias are a gorgeous, highly scented ornamental evergreen that are native to the tropical and subtropical regions of Asia. However they can be expensive but they will easily take from cuttings is you have access to a heated propagator.

Gardenia bloom
To begin with, take 3 inch long cuttings from non-flowering lateral shots, using a sharp sterilized blade. This is best done in February or March to take advantage of the plants natural desire to produce new growth. If you can, do not cut all the way through the shoot as leaving a slight heel at the end of the cutting will help to encourage better rooting.

Use a good quality compost such as John Innes 'Seed and Cutting' or make your own using equal part by volume of sphagnum moss peat and horticultural grade sand, fill pots or preferably a large sized modular seed tray. There is an advantage to this as moss peat is naturally acidic - if you can find any! Sedge peat is not a suitable alternative.

Dip the base of the cutting in to hormone rooting powder, tapping off any excess back into its container. Using a dipper, create a suitably-sized hole in the compost and carefully place in the cutting, trying to avoid rubbing off the hormone powder on the sides of the hole.

Gently water the cutting in and place at the propagator at a temperature between 18-21 degrees Celsius. The cuttings should begin to root after about 3 weeks but don't keep pulling them to check otherwise they will never root. Once the cuttings have established in the module they can be popped out and potted on into 3 inch pots. Avoid disturbing the root system at all times. Keep them in a warm, protected environment, watering and potting on as necessary in ericaceous compost.

For related articles click onto the following links:
HOW TO PROPAGATE ABUTILON FROM CUTTINGS
HOW TO GROW THE VIRGINIA CREEPER FROM CUTTINGS
HOW TO PROPAGATE BOX HEDGING PLANTS
HOW TO TAKE CHRYSANTHEMUM CUTTINGS
HOW TO TAKE CUTTINGS FROM CAMELLIA
HOW TO TAKE CUTTINGS FROM CLEMATIS
HOW TO TAKE CUTTINGS FROM COLEUS
HOW TO TAKE CUTTINGS FROM FUCHSIA
RHS Gardenia
THE MADAGASCAR JASMINE

HOW TO GROW DILL FROM SEED

How to grow dill from seed - http://www.feastingathome.com/


Dill is an exquisitely flavoured herb with is perhaps best associated with gravlax (cured salmon), regular salmon and other fish dishes, borscht, soups, and pickles. It is a hardy annual and both the leaves and seeds are used in flavouring. Unfortunately dill loses its flavour quickly if dried so it is best served fresh from the plant. Be that as it may it is worth deep freezing leaves for use out of season but this process will cause them to lose their fresh-green colour.

Image credit - http://www.harvesttotable.com/
Luckily dill is easy to grow from seed, but to ensure a constant supply of fresh leaves make successional monthly crops from March to July. You will need  a rich, well drained soil, preferably in full sun.

Sow dill seeds outdoors in shallow drills 25-30 cm apart. Dill seeds require light to help initiate germination so only cover with a thin layer of soil and gently water in. Once the seedlings emerge, thin out the weakest until you have approximately 1 plant every 30 cm. Keep the rows well weeded and watered.

The plants should be ready for use 6-8 weeks after sowing. If you intend to collect your own seeds afterwards so a crop in July as this will give it enough time to ripen by the end of the growing season.

For related articles click onto the following links:
BBC Dill
Buy Cilantro Seed
Growing Chives from Seed
HERBS FOR ANXIETY RELIEF
HOW TO GROW BASIL FROM SEED
HOW TO GROW BASIL FROM SEED INDOORS
HOW TO GROW CHAMOMILE
How to Grow Chives
HOW TO GROW COMFREY
HOW TO GROW HERBS FROM SEED
HOW TO GROW LEMONGRASS
HOW TO GROW LEMONGRASS FROM SEED
HOW TO GROW MINT PLANTS
HOW TO GROW PARSLEY FROM SEED INDOORS
HOW TO GROW SAGE 
How to Overwinter herbs

GROW PASSIFLORA INCARNATA SEEDS

Grow Passiflora incarnata seeds

Commonly known as the maypop, or purple passion flower it is one of the hardiest species available, although it is a rarely seen in local plant retailers. Despite this it is relatively simple to grow from seed.

 Passiflora incarnata seedlings
Sow Passiflora incarnata seeds in modular trays or pots containing a good quality compost such as John Innes 'Seed and Cutting' and at a depth of 6 mm. Gently water in and once the excess water has drained away place inside a heated propagator at temperature between 20-25 degrees Celsius. Alternatively seal inside a clear, polythene bag and place on the windowsill of a warm bright room, but one that does not receive direct sunlight.

Germination can be slow, and if you haven't had any seedlings emerge after three months then you will need to think about encouraging your seeds by breaking their dormancy. This is done by transferring the seeds to a fridge, not the freezer, for a further 3-5 months. After this period of cold treatment place the seeds back into the heated propagator where there is now no excuse for your seedlings not to emerge in approximately 3 months. Remove the tray or pots from the propagator or polythene bag and move to cooler, but frost-free conditions. Water as necessary.

Once the seedlings are large enough to handle, pop them out of their modules, damaging the root system as little as possible and pot on into 7.5 cm pots. Pot on as required until the weather is suitable for planting them out into their final position.

For related articles click onto the following links:
Buy Musa lasiocarpa Seed
HOW TO COLLECT AND PREPARE HARDY PASSION FLOWER SEED FOR SOWING

GROW SNAIL VINE SEED

Snail vine blooms


Native to tropical South America and Central America the snail vine is a perennial climbing plant that can be germinated at anytime of year, although in cooler European climates it will need to be grown as a container plant so that it can be brought in under protection over the winter.

Snail vine botanical illustration
The snail vine is notable for its beautiful, yet unusual curled-shaped flowers that are reminiscent of a snail's shell. Vigna caracalla can also be found under the common names of corkscrew vine, snail creeper or snail bean.  Thomas Jefferson, the United States third president was so taken by it that he called this plant "the most beautiful bean in the world". This statement makes more sense once you know that like all humble, edible beans the snail vine is a member the Fabaceae family.

Before you sow snail vine seed they will need to be chipped or soaked in warm for 1-2 hours. Using pots or modular seed trays filled with a good quality compost such as John Innes 'Seed and Cutting, sow the snail vine seeds on the surface of the compost - do not bury them.

Because snail vine seeds require the presence of light to help initiate germination, lightly cover with more compost or fine grade vermiculite. Put the pots or tray in a heated propagator a temperature of between 21-25 degrees Celsius, alternatively seal inside a clear, polythene bag.

Place on the windowsill of a warm, bright room, however make sure that pots or tray do not receive direct sunlight as this can scorch the seedlings and dry out he compost. Germination should occur between 14-30 days. Once the seedlings begin to emerge, remove from the propagator or polythene bag and grow them on in cooler conditions potting on and watering as required.

For related articles click onto the following links:
Buy Musa lasiocarpa Seed
HOW TO GROW THE SNAIL VINE FROM SEED
RHS Snail Vine

GROW GIANT TOMATO SEEDS


If you are looking to grow giant tomato seeds Tomato 'Brutus' is one of the biggest available, able to produce fruits 8 inches in diameter and an impressive 2.2lbs in weight. More experienced growers can achieve weights almost double that!

It is a juicy beefsteak cultivar which is not only ideal of attaining huge sizes but makes for an excellent eating tomato for use in sandwiches and salads. The delicious, rich red fruits are heavily ribbed and are suitable for growing both outdoors or as a greenhouse crop. In order to help Tomato 'Brutus' fruits reach their largest sizes, make sure that the trusses are trimmed to only 3 or 4 fruits per truss.

When growing from seed, greenhouse plants should be sown early from February to March, while outdoor plants should be sown from March to April. As you would expect, plants grown under protection will have a better chance of reaching their maximum sizes.

Using a modular seed tray, fill with a good quality compost such as John Innes 'Seed and Cutting' and gently compress and water in. Sow tomato 'Brutus' seeds on the surface and cover with a fine sprinkling of compost or vermiculite as the seeds require light to help initiate germination. Place seed tray inside a heated propagator at a temperature between 15-20 degrees Celsius. Alternatively seal inside a clear polythene bag and place on the windowsill of a warm bright room, but one that does not receive direct sunlight. The first seedlings should begin to emerge around 7-14 days, at which point they can be removed from the propagator or polythene bag.

For related article click onto the following links:
BLIGHT RESISTANT TOMATO VARIETIES
Buy Giant Leek Seeds
Buy Musa lasiocarpa Seed
FLEA BEETLES ON TOMATO PLANTS
HOW TO COLLECT AND PREPARE TOMATO SEEDS FOR PROPAGATION
How to Grow Giant Tomatoes
HOW TO GROW GREENHOUSE TOMATO PLANTS FROM SEED
HOW TO GROW OUTDOOR TOMATO PLANTS FROM SEED
HOW TO GROW TOMATOES
HOW TO GROW TOMATOES IN POTS
HOW TO MAKE A TRADITIONAL ITALIAN TOMATO SAUCE
World Record Tomato

GROW GIANT ONION SEED

Image credit - http://www.epicgardening.com/


Giant onion seeds are the result of many years careful selection by plant breeders, and while they are genetically capable of growing to huge sizes, you will need to provide the optimum conditions in order for the onions to reach their full potential.

Please note that these onion varieties have not been artificially or genetically manipulated other than by means of selecting seeds from plants that has shown a natural propensity to grow larger. In the case of some of these varieties this year on year procedure has taken over a century to produce massive sizes we see today.

Image credit - http://www.medwaycommunityfarm.org/
The key to growing giant onions is to give them as long a growing period as possible. Most growers will sow their onions in the spring but the competitive giant onion grower will need to start far earlier under protection in January.

At the same time you will need prepare the area that the onions will eventually be grown in. If you prefer this can be done in the autumn when the weather is better and the ground less like to be frozen. Dig in plenty of well rotted garden compost to help improve both drainage and soil fertility. The reason why this is done so early before planting is because onions do not like to be grown on freshly manured soil. To ensure good drainage, especially if you are prone to a lot of rain during the growing season you may wish to grow your onions in raised beds or polytunnels.

As previously mentioned, sow giant onion seed indoors in January. Using module trays, fill with a good quality compost such as John Innes 'Seed and Cutting' and sow the seed at a depth of ½" deep. Gently water in and then place the modular tray in a propagator at a temperature of approximately 10-15 degrees Celsius. Alternatively seal the tray inside a clear polythene bag and place in a warm bright room on a windowsill that does not receive direct sunlight. Germination should occur within 10-14 days.

When the seedlings emerge, remove them from the propagator or polythene bag but move them to cooler conditions. Once all risk of late frosts has passed they can be hardened off for a week or two before being planted outdoors in their permanent position at a distance of 12 inches apart. Newly planted onions will need to be protected from attack from birds until they establish their root system. Water the plants thoroughly after planting and keep the bed weed free to avoid competition for nutrients. You will need to hand weed around the bulbs to prevent damage from metal tools.

For related articles click onto the following links:
Buy Giant Leek Seeds
Giant onion record
HOW TO GROW GIANT VEGETABLES
HOW TO GROW JAPANESE ONION SETS
HOW TO GROW ONIONS FROM SEED
HOW TO GROW ONIONS IN AFRICA
HOW TO GROW ONIONS FROM ONION SETS
HOW TO GROW WELSH ONIONS
HOW DO YOU PLANT OUT ONION SEEDLINGS?


HOW TO GROW GOOSEBERRIES

How to grow gooseberries


Over the years gooseberries have seem to have become a lost fruit. It is rarely seen in the supermarkets and due to its reputation of being of becoming completely covered in mildew it is rarely grown in the allotments. Sadly this reputation has been well deserved but a lot work has been undertaken in recent years by clever plant breeders and as a result there are now a number of excellent mildew resistant varieties available.

Gooseberry botanical drawing
One of the best varieties is Gooseberry 'Invicta'. Not only is it one of the heaviest cropping varieties available, it can produce almost twice as much fruit as other varieties and has also been awarded the Royal Horticultural Society's ward of Garden Merit in 1993. Other varieties to consider which also have been awarded the AGM are gooseberry ‘Careless’ (1993), gooseberry ‘Greenfinch’ (1994), gooseberry ‘Leveller’ (1993) and gooseberry ‘Whinham’s Industry'.

Gooseberries are usually bought as bare-root plants in the autumn or as 2-3 year old pot-grown plants grown as bushes in the spring. They will be happy on any well-drained soil but before planting, dig in plenty of well rotted farm manure or garden compost. Gooseberry bushes will do best gown in full sun.

Culturally, gooseberries are grown on a leg and given an open goblet shaped habit. This is important as it creates an open habit, allowing plenty of air movement which reduces the incidence of mildew. In order to maintain this habit, remove any shoots or dormant buds from the base of the plant as these will produce unwanted suckers later on.

Bare-root gooseberries will need to be planted between late autumn and early spring, while container-grown plants can be planted at any time of year so long as you avoid waterlogged, overly dry or frozen soil.

If you can, choose two or three-year-old plant with a well-balanced head of three to five main branches and a clear stem (known as the leg) of up to 6 inches above the soil level. Bare rot plants should have a good spreading root system.

Image credit - http://www.graigfarm.co.uk/
Plant gooseberries approximately 5 ft apart at their original depth. For bare-root stock, this level is indicated by a distinct colour change on the stem. Once planted, mulch the root area with organic matter, such as garden compost or bark chips, to conserve soil moisture.

Water gooseberry plants well for the first year until plants are fully established. Do not allow the soil must not dry out during hot periods, especially while the fruit is being formed.

Remove any suckers from the base of the plant, and consider netting the bushes once fruit begins to set to protect them from birds.

Gooseberry fruit is usually left on the bush until they have fully ripened in June.

Pruning is done over the winter. Begin by removing any dead, diseased, damaged or crossing stems, before thinning the remaining stems to create an upright open bush. Shorten the remaining stems by half. A seasonal a mulch of well-rotted farm manure or garden compost can be applied each spring.

For related articles click onto the following links:
BBC Gooseberry
BUY CAPE GOOSEBERRY SEEDS - Physalis peruviana
CAN YOU EAT SEA BUCKTHORN BERRIES?
HOW TO GROW KIWI FROM SEED
HOW TO GROW A MULBERRY TREE
THE PIG FACE FRUIT - Solanum mammosum
What is a Fig?

GROW AQUILEGIA SEEDS

Grow Aquilegia seeds


You have a couple of opportunities to sow Aquilegia seeds. The first is from February to June, and if you miss this first season then you have another opportunity from September to October. Using a seed tray filled with a good quality compost such as John Innes 'Seed and Cutting' gently water before sowing the seed.  Sow the Aquileia seed on the surface of the compost and cover with a fine sprinkling of vermiculite. This is because Aquilegia seeds require light to help promote germination.

Image credit - http://ebd06.ebd.csic.es/
Place the tray inside a heated propagator at approximately 15-20 degrees Celsius. Alternatively, seal the tray inside a clear polythene bag and place on the windowsill of a warm bright room. Just make sure that the window does not receive direct sunlight s this can overheat the seedlings and dry out the compost. You can expect the first seedlings to emerge in 1-3 months. When the first leaves break through the surface of the compost they tray can be removed from the propagator or polythene bag but left on the windowsill and water as required.


When the seedlings are large enough to handle they can be transplanted into 3 inch pots

Aquilegia plants sown in September  can be placed in a cold-frame over winter and planted out the following spring.

For related articles click onto the following links:
AQUILEGIA 'CHOCOLATE SOLDIER'
BUY AQUILEGIA VULGARIS 'MAGPIE' SEEDS
How to grow Aquilegia from Seed

HOW TO GROW BELLIS PERENNIS FROM SEED

How to grow Bellis perennis from seed


The ornamental Bellis perennis hybrids and varieties are in fact cultivated forms of the common European species of daisy which is often considered to be a lawn weed! Found in plant retailers during the early spring they are a fantastic, large flowering (comparatively so)  herbaceous perennial plant which produces masses of tightly quilled button flowers on compact plants. Growing well in shade they are good for planting under trees or as an edging for patio borders etc

How to grow Bellis perennis from seed
A native to western, central and northern Europe they are extremely easy to grow from seed and as such it is not necessary to grow them in a seed tray as they will germinate quite happily directly sown outdoors.

Sow Bellis perennis seeds in late spring to early summer in a sheltered, shady site. They are best sown on the surface of a well prepared, but unfertilized seed bed then gently rake in so that they are approximately 1/4 inch deep.

Gently water in using a soft rose attachment so that the seeds are not buried further or knocked out of the bed. Germination should occur between 14-21 days.

Once the seedlings are large enough to handle they can be thinned to between 4-6 inches apart.

Water and weed as necessary over the summer and come the autumn they can be transplant to their final position 9 inches apart.

Bellis perennis hybrids and varieties will do best in a sunny or part-shaded position where they will return to flower the following spring.

Main Image credit - Simon Eade

For related articles click onto the following links:
How to Grow Delphiniums from Seed
HOW TO GROW ERIGERON KARVINSKIANUS
HOW TO GROW LUPINS FROM SEED

GROW CYCAD SEEDS

Grow Cycad seeds


Cycads are often considered to be living fossils having evolved more than 110 million years ago and are characterized by a stout and woody trunk with a crown of large, hard and stiff, evergreen leaves.

In temperate regions they can be grown as houseplants, or even outside in the garden in mild climates.

Cycad seeds
They will even survive outside in the southernmost parts of England so long as you can provide a warm, sheltered position and adequate frost protection. They will even tolerate several degrees of frost but not without clear signs of damage on the foliage. To be safe I would always advise to overwinter under frost free protection.

Sow Cycad seeds in 4 inch pots containing a good quality compost such as John Innes 'Seed and Cutting'. The seed should only have the slightest covering of compost or vermiculite as they require light to help initiate germination.

Water in and allow the excess to drain away before putting in a heated propagator at a temperature of between 20-25 degrees Celsius.

Alternatively seal inside a clear polythene bag and place on a warm bright windowsill but one that does not receive direct sunlight.

It can take 1-3 months for the seeds to germinate, over this period keep the compost moist but not over wet.

Once the seedlings emerge remove from the propagator or bag, watering and potting on as necessary.

For related articles click onto the following links:
Buy Musa lasiocarpa Seed
Cycads
HARDY PALM TREES FOR GROWING IN COLD CLIMATES


HOW TO OVERWINTER BANANA PLANTS


We are all familiar with bananas from the fresh produce isles in our local supermarkets. Of course, unlike apples and pears, bananas are a tropical fruit, the produce of tropical plants and wholly unsuitable for growing in countries with temperate climates.

How to overwinter Banana plants
However those of you with have a passion for the exotic may well be aware they there are a number of banana species and cultivars that are listed as 'hardy'. By being considerably tougher than the common edible banana plant it is possible to grow them quite successfully in cooler northern European climates. The secret to their hardiness is this. While they are indeed native to tropical and subtropical regions around the world, they have evolved to survive in the higher altitudes of mountain ranges where there is less competition for light and nutrients.

That being said, there are no banana or related genera whose foliage will tolerate a hard frost. What makes them classed as hardy is the root system which for a number of species are cold hardy.

You have two choices when it comes to overwintering bananas and this will depend on the species grown and the climate it is being grown in.

How to overwinter Banana plants
1. The first choice is to grow it as container plant and submerge in the ground during the growing season. Species such as Ensete ventricosum ‘Maurelii’ and Musa sikkimensis will require this in climates cooler than the south of England.

2. The second choice is to plant your banana directly into the ground and provide winter protection in site. Species such as Musa basjoo, Ensete glaucum and Musa lasiocarpa should be fine in most temperate countries so long as they have a thick protective mulch..

Container grown plants will need to be lifted and brought in under protection in the autumn before the first frost and placed in a large sunny room over the winter period. Treat as you would any other houseplant by reducing both water and fertilization.

How to overwinter Banana plants
If your container grown banana plant is too large to bring inside then cut back the leaves to 6-8” in the autumn fall after first frost. Store in a cool, dark, frost-free position until the threat of late frosts have passed in the spring. Keep the compost just on the moist side, and avoid the compost from completely drying out. Do not over-water during this period as the roots will quickly succumb to rots.

Plants left in the ground can be treated in two ways. Either protect the pseudo-stem with a jacket of dry mulch such as straw or bracken, or allow the stem to succumb to the cold, remove and then give the root systems a thick layer of dry mulch. All winter protection can be removed once the threat of late frosts have passed.

For related articles click onto the following links:
BANANA PLANTS